
Wednesday, November 16, 2011
Sally Hansen Houndstooth nails
I cut some up and played with color and rhinestones for this nail design. Let's see how long they last!
Tuesday, November 08, 2011
Snowman Nail Polish

Monday, November 07, 2011
Handmade tote bags, my new obsession.

I have FINALLY delved into the world of sewing and I LOVE it! I learned how to make this bag in a class I took in Brooklyn (I'll be writing a review for them soon). It's an altered See & Sew pattern (#B4271 found here) The only two pieces used were 2 and 3. It's technically reversible but the interfacing is fused to the outside fabric only and I like the stiffer fabric on the outside better, so I don't really like to reverse it for use.

I found this leopard print fabric in Manhattan and have run out! I need to go back this week to get more bc it is just too fab. This bag shown is my little sisters.

This one is also my little sisters bag, its a houndstooth print (from Mood Fabrics) and a Paisley fabric found at another Manhattan Fabric store....I forgot their name but will find out and share! The Middle part needs some ironing.


Close up of the inside of the bag.

Made this one for my mom. The fabric for this bag is from Joann's.
Pink Leopard tray

I bought this small tray at Michaels, unfinished wood. I used acrylic paint to hand paint it. I just need to finish it by sealing it with a coat of Mod Podge to protect it and give it a semi-glossy look. Super easy, super cute and hold my nail designs for now. :-)


Monday, October 31, 2011
Rhinestone Nails
These are easy to do. Paint your nail the base color you want. Then use clear polish to adhere the rhinestones you want. (I used a toothpick to give me a more precise application) then cover with to coat. My Seche Vite tends to bubble up though. (I still use it bc it's the only top coat I have right now) 
Friday, October 28, 2011
More Leopard Nails!
My first designs using acrylic. It's not as easy as I thought. I need more practice with it :-)
Simple Heart Nail Design
This was a super quick and simple nail design. I used Essie polish and some black heart shaped rhinestones. 
Acrylic Paint Flower Nails
I used acrylic paint to make this flower design. I basically just mixed a bunch of different colors to get the flower look.

Rhinestone Nail Art Decals

Found Rhinestones, pearls and clay nail art decals at a beauty supply in the city today. Can't wait to put them to use!
Sunday, October 23, 2011
DIY Ring Wall Holder

Okay this project started out as a complete mistake! As you can tell from my previous post it is the same structure for my Nail Polish Rack, except the shelves on this one were too short and none of my polishes fit. After working so hard on it I didn't want to throw it out. Then one day It dawned on me that I could turn it into a ring holder! I used all the same items that I used to make my Nail Polish rack and only added the foam rolls. These are repurposed from the dollar store, they are Hair curlers. I just simply took out the Plastic pieces. I used the LOW HEAT (Very important- I learned this the hard way) setting on my hot glue gun to attach the foam to the board itself. The "Jumbo" size fit best. I wanted to do the whole thing with pink foam rollers but they didn't have enough so I had a Tim Gunn "Make it work" moment by adding the black.

The above picture is the close up of the foam rolls and some rings. The popsicle sticks are glued onto each shelve to make it easier to attach the trimming. I have TONS of rings, right? I love tchotchke things, and these rings fill my obsession with obnoxiously bright, and blinged out accessories without the high price tag. Below is a picture of the whole thing. :-) I haven't quite figured out what to do on the blank space to the right. I thought of writing "Rings" but I don't know...I'll update when I decide.

Super Easy DIY Nail Polish Wall Rack

This is my Nail Polish Rack. I did it myself with 3 Black Foam Boards, a (sharp) box cutter, hot glue gun, popsicle sticks, gold trim and black acrylic paint. Below is a picture of it without the polishes inside. It holds more than 100 nail polishes. I gave each shelf a lot of room so the taller polishes will also fit. The shelves are deep so you can line up two rows of polish, but that would probably make it too heavy, especially if it is hung on a wall. Mine sits on my makeup desk -for now- bc I haven't really found it a permanent spot. Its a super easy DIY ( Do It Yourself ) project.
The popsicle sticks are glued on to each row to work as a ledge to prevent the nail polishes form slipping off. It also made gluing the trimming on super easy.

Below is a pic of it filled up with my polishes. Not including the Nail Art brush polish, there are approx 95 bottles. I didn't really put them in any specific order, just grouped them by brand. I did put my newest and most used polished on top. The Nail Art Brush Polish just kind of all fell together there at the second to last shelf.

Monday, October 17, 2011
Mini Nail Polish Wall Rack
This DIY Project is SO much fun to make! I am working on a tutorial for it but you can find tons of YouTube videos on how to make one also! I am making another one that is bigger and also have another secret similar project I can't wait to share by the end of the week!
This rack holds approx 45 polishes.
I used black foam board, a hot glue gun, a box cutter and a Tsquare ruler to make the actual rack. Then I used Popsicle sticks, chipboard letters and rhinestones to decorate it. It's really easy!
This rack holds approx 45 polishes.
I used black foam board, a hot glue gun, a box cutter and a Tsquare ruler to make the actual rack. Then I used Popsicle sticks, chipboard letters and rhinestones to decorate it. It's really easy!
Tuesday, October 11, 2011


Hot Pink Leopard and Houndstooth Nails
I wasn't 100% satisfied with my nails the last post. So I redid them. Now, I LOVE them lol. (they looked good before also but I like these more)


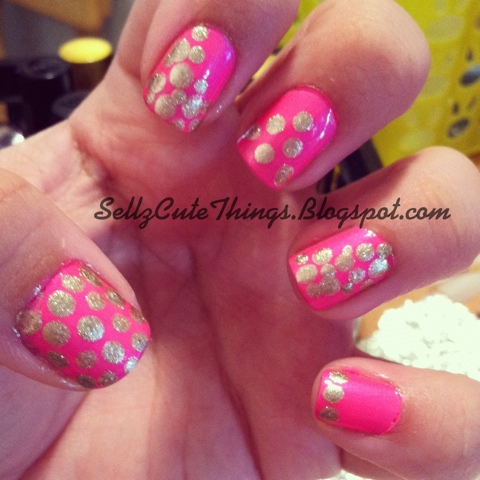
Hot Pink and Gold Nails
My new favorite nail combo. The base is China Glaze Punk Voltage (neon) and the dots are Finger Paints Key to My Art. I used a dotting tool.

Monday, October 10, 2011
My first sewing project
I took a sewing class here in Brooklyn the other day and absolutely loved it! We learned to make a reversible tote bag (below). I am currently looking into buying a sewing machine to finish some more totes. I have about three patterns cut out and ready to be sewn, ironed and put to good use.


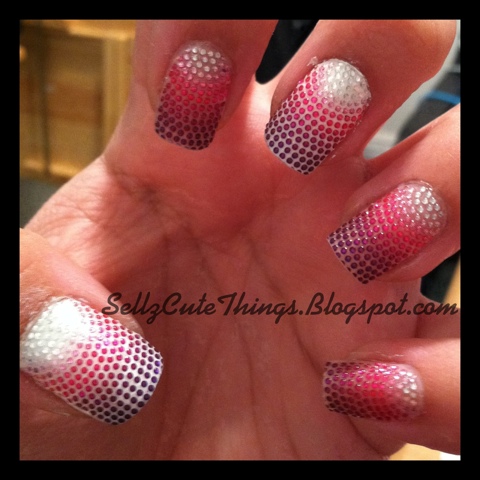
Houndstooth Nails
I used my Konad stamp for this. It's a little smudged still-I need to practice! Lol I did alternating colors on both hands. I used the Houndstooth plate.


Sunday, October 09, 2011
Leopard Print Manicure
I did my sisters nails. Leopard Print Mani. Freehand with nail polish and a dotting tool.

Freehand Nail Designs
Freehand designs. Used a nail art polish (the one with the long skinny brush) some look tribal.


Subscribe to:
Posts (Atom)